
Budget setting is one of the most tricky parts of Facebook Ads. Every new advertiser seems to struggle to figure out how much it is that he/she needs to set as the budget that’ll get his/her job done at the lowest possible cost.
There are a couple more things that you need to choose as well in the ‘budget setting’ window of the ads create tool.
This lesson aims to introduce you to that window and explain what are the options, and what to choose in what situation or goal in mind.
Also, choosing creatives for your ads is a tricky option too. It can have a good impact on deciding how well your ad is going to convert.
How better you’ll attract your audience with your ads, depends on a ton on your ad creatives. So I’ll dig into that too to help you out choosing the best creatives for your ad.
Hello and welcome back to this “Facebook Marketing ABC” course that aims to teach you how to do advertising/marketing with FaceBook.
This is the second lesson of the third chapter that’s focused on setting the budget for your Facebook ads and choosing ad creatives. If you’re interested, the previous lessons can be found here.
- Part 1.1: Introduction, Basics & Ad Types
- Part 1.2: Targeting Methods & Basic Advertising Terminology
- Part 2: Getting Started With Ad Account – Ad Account Creation & More!
- Part 3.1: Identifying Primary Audience & Targeting with Interest
- Part 3.2: Behavior & Connection Targeting!
Without further delay, let’s get into the first section of this lesson – The “Budget Setting” window of our ‘Ad create’ tool.
How to Set Up Budget For Your Facebook Ads
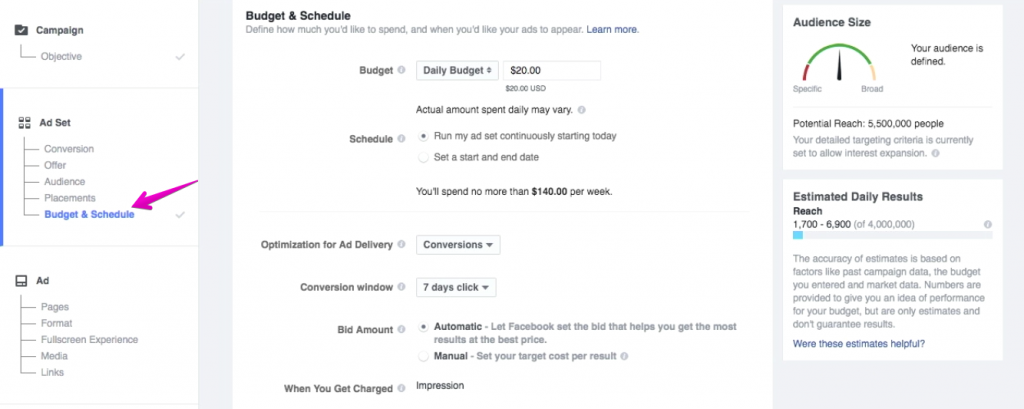
Okay, here’s the budget setting window for the ad we were creating in the ads create tool. There are various options to set such as budget amount, daily or lifetime budget, schedule, optimization for ad delivery and so on.
We’re going to start off with the “budget” option.

As you can see, Facebook will suggest us a “daily” budget for the ad we’re about to run. For our ad, Facebook suggested us a daily budget of $20 depending on the size of our target audience.
You can change the amount as per your wish, and make it as low as $5 per day. I’ve just done that and set the budget to $5/day for my ad. For new advertisers, I always recommend starting smaller.
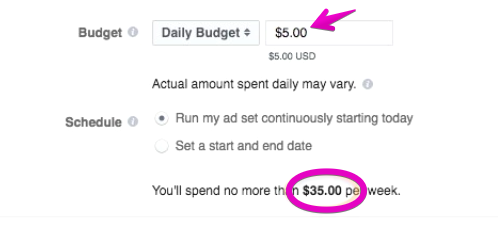
With that budget, Facebook tells you underneath that you’re going to spend the highest $35 per week.
But it’s not correct to think that you’re must to spend $35 every week (or $5 a day). Rather, it’s your highest spend limit. Once the ad hits the budget, it’ll pause and refrain from showing up to further audience.
But if it can reach all the desired audience at a lower cost than budget, then that’s the amount you’ll be charged, not the maximum budget.
In addition to the daily budget, there’s another option to set the lifetime budget.
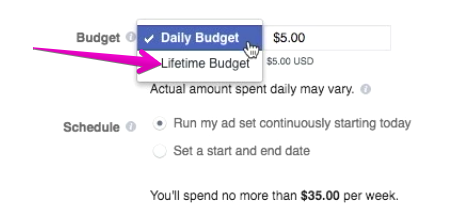
Lifetime budget takes the lifespan of the ad into consideration and calculates by itself how to spend the money for the most effective return.
When setting up a lifetime budget, you’ll have the option to choose a start and end date to run your advertising campaign that includes exact times.
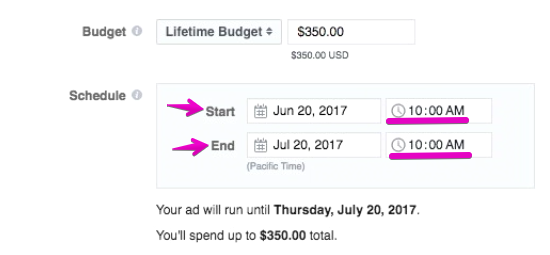
During this time period, Facebook will try to spend the entire budget that you’ve set. It’ll calculate by itself the money expenditure pattern so that it can utilize the full budget.
However, if there are not enough audience to show the ad to, the ad expenditure might not hit the maximum budget and you won’t be charged the whole amount of your budget, only the amount that has been spent.
Setting the ad budget from the lifespan perspective can be a good option when you have a specific window to run your ad within, might be a sale or coupon giveaway and so.
When it comes to budget defining, there are some other advanced options that you can play with. But for new advertisers, I recommend sticking to the default and basic options.
This’ll help you gather experience and insights on Facebook ad expenditure pattern. Once you’re familiar with that, then you may want to proceed further to tweak advanced options.
Heading to the next option, here’s “Optimization for Ad Delivery”
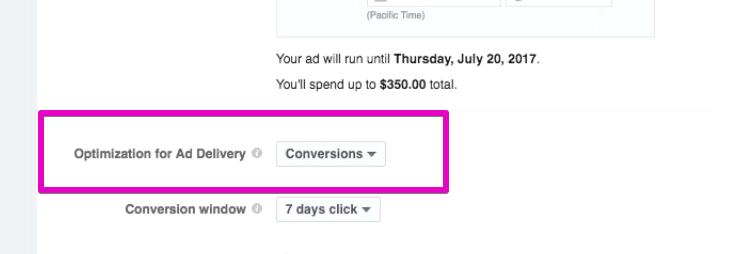
This is one further layer on your ad goal. As you can see it is set to conversions by default.
If you click the dropdown menu, you can see there are other options while it recommends conversion. This is so because of our ad goal that we’ve defined in the beginning.
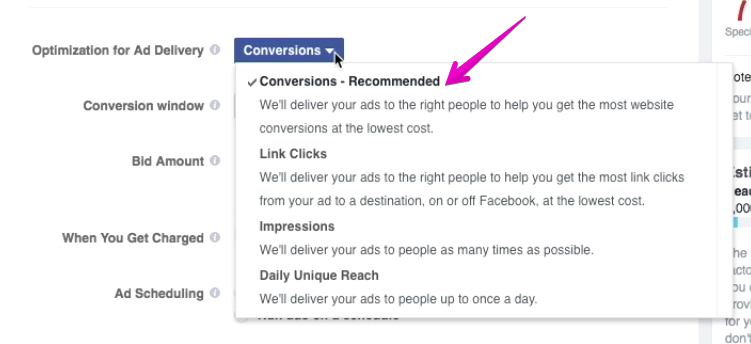
As we select the Conversions option, Facebook will crossmatch few things and serve the ads to the highest possibly targeted people to help me get the maximum conversion at the lowest cost.
What the other options do?
The next options say “Link Clicks”, means FaceBook will deliver my ad to those group of people that has the most chance to click my link, to send them somewhere on or off Facebook.
Furthermore, you can also optimize the ad for impressions. Doing so, Facebook will optimize things in a way to show your ad to as many people within your target audience.
Now, you may ask, why do you have to choose this, when you’ve already set your ad goal in the beginning?
Well, this is the final layer of optimization from Facebook. This is where you specify your goal further.
Facebook knows their users best as they’ve data on which group of user usually clicks most, which converts most and so on.
So when you tell Facebook the optimum optimization you prefer for your ad, it cross matches few things, like your initial goal, the audience you’ve targeted, and your budget to determine the best possible way to get you the best possible output.
And also, if you have selected brand awareness as your goal for this ad, you could see different optimization options here that are specific to brand awareness.
In the same way, final optimization for ad delivery options here will depend on the primary goal you’ve selected.
The next box in budget section refers to Conversion window. It’s where you define how to define a conversion and how they are tracked and recorded.
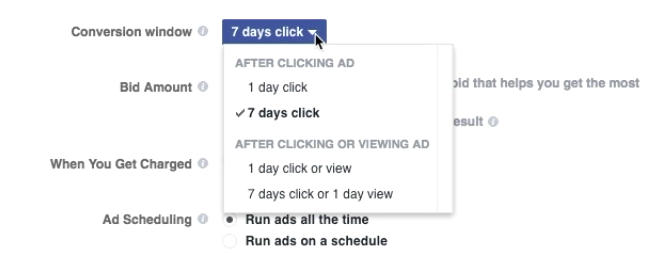
For example, it is default set as 7-days click. It suggests that Facebook will consider anything a conversion up to 7 days after clicking an ad.
For our ad, we’re going to leave it as it is, means 7 days click.
Underneath we have the option to enter “Bid Amount”.

Now there are 2 options here – Automatic & Manual.
When you choose automatic, Facebook is going to control the bidding process for you. It’ll calculate and set the bid for you that helps you get the most results at the best price, as it suggests.

Facebook tends to always bid the lowest amount, either at a lifetime or per day value budget you’ve set. For a newer advertiser, I recommend keeping it to automatic.
But if you want to know about manual bidding, it’s actually where you’ll see how much my ad will cost to run per impression.
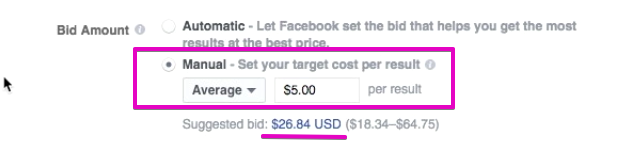
You’ll usually end up paying less, that what you’ve entered in case of bidding manually.
Now apart from defining the value (which is setting the target cost per result), you can also set whether that’s an average or maximum value.
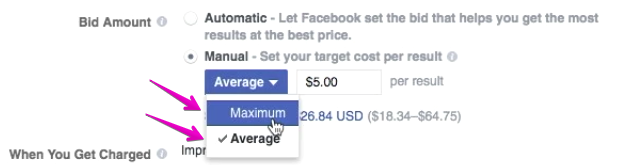
When you set it to average, that means you’re telling Facebook that you’re expecting that cost on average for each result.
Maximum means telling facebook that is the maximum amount you want to spend for one result.
However, for our ad, I’m going to stick with the automatic option.
Underneath, Facebook clears it to me when I’m going to get charged.

Currently, it’s set to impression, means I’m going to get charged whenever someone is served my ad.
Now, not necessarily they might have seen the ad well. Facebook will charge me whenever my ad shows up on someone’s screen. They might look consciously at it, they might not. But you’ll get charged – that’s how charging by impression works.
If you want to know more about that, hover over the information icon I’ve marked in the picture above, and you’ll get details information about how you’re gonna get charged.
Below that, here’s the ad scheduling option. This is useful for time-sensitive ads.

As you can see, there are two options – to run ads all the time or to run ads on schedule.
If you have an ad that you want to show on a particular time of particular days of the week, you may select the second options which are to run ads on schedule.
When I click that, this box appears.
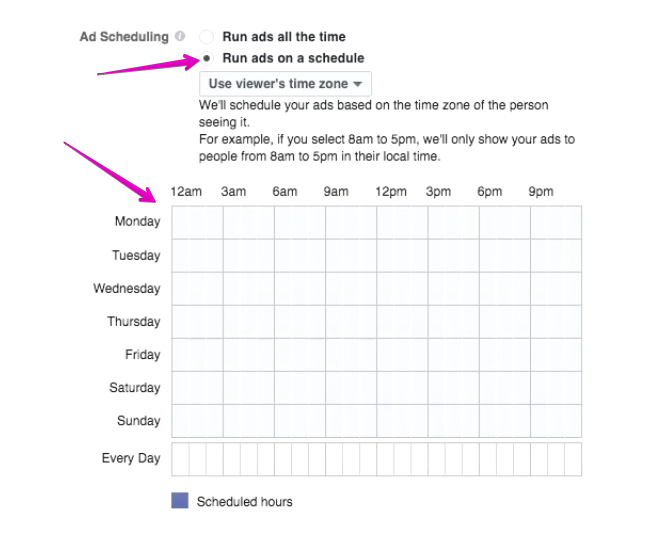
Here, I can mark boxes the select exactly at what time of the week I want my ad to run, and Facebook will run your ad only for those particular hours. In other time, it’ll stay paused.
If you have any data of when your target audience usually stays on Facebook or when they’re likely to interact more, you might utilize the power of this option to get maximum results.
Since I don’t have any such concern for my ad, I’m going to stick with the option to run ads all the time.
The final option in our budget setting window is delivery type.

Here, you can decide whether to show your ad to your audience as quickly as possible or whether to drip them out over a period of time.
When you click the Accelerated option, Facebook will try to deliver your ad as quickly as possible. That’s something you may choose to do when you have a short time left before a campaign of yours and you want to spread the news as quickly possible.
But when you keep the option to Standard, it’ll drip the audience out slowly to gain maximum conversion. When you’re in no hurry, this is what I’d recommend, and so does Facebook.
That’s all you have to deal with in the “Budget Setting” window. If you’re a new advertiser, I’d recommend to play a li’l safe here and not tweak much of the advanced options, rather stick to the defaults, and always start small as well.
If you’re clear with all this, I’d like to jump on the next section – which is “Choosing Ad Creatives”
Choosing Ad Creatives
The last step of creating a Facebook ad in the ads create tool is creating the ad itself, that consists of images, links, videos, texts and so on.
The type of media or content you’ll have to provide depends on the objective that you’ve selected for your ad (ex-conversion, brand awareness etc.)
Since we had set conversion as our objective, these are the ad formats available for creating our ad.
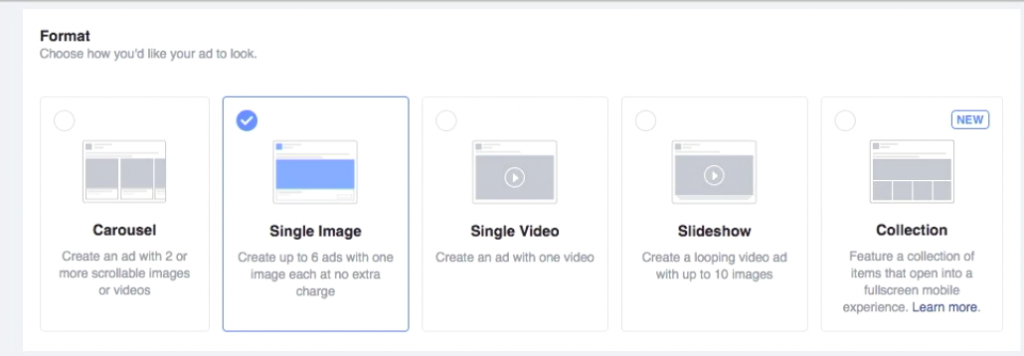
This means, these are the preview/format of the actual ads that Facebook offers when we select conversion objective – this is how they’ll look in the users’ screen. Similarly, if we had chosen something else like brand awareness as our objective, the formats available here would be different.
Now, usually conversion ad formats are the most complete ones when it comes to the content required.
Means, to create a conversion ad according to the formats that Facebook provides, you usually need all type of contents that you may need to create an ad under all other objectives.
So if I demonstrate you how to create a conversion ad, it’ll cover the basic process of creating an ad under almost all the objectives.
Okay, to create a conversion ad, the first thing you need to choose is the ad format.
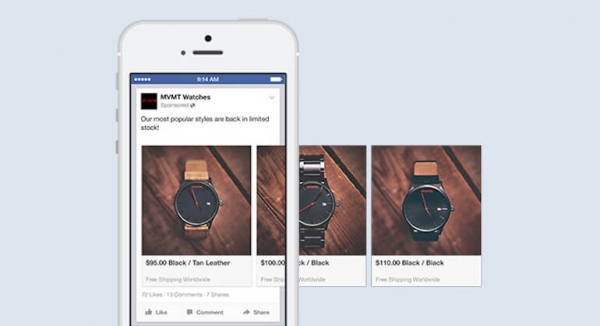
The first option we have is carousel.
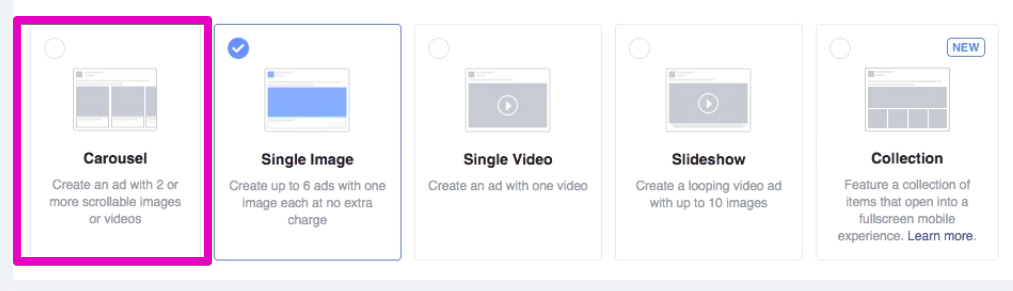
Carousel means you can have two or more scrollable images or videos in your ad. In a smartphone, you can swipe right to see those come by one after one, as you keep swiping.
In PC, you can just scroll to do the same.
You might have seen ads from online stores that show you a collection of shoes or so, in the same way, where one of the product shows up, and you swipe right if you’re interested to see more, and finally you get a link to see the entire collection.
That is a carousel ad, which looks like this –
The next format available is a single image.
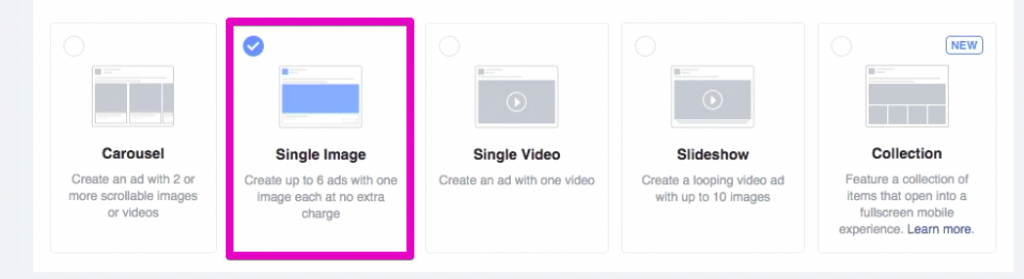
Here, you can create the ad with one solo image only. But the interesting thing is that, you can create up to six different looking ads with these images without any extra charge.
Those ads will show up simultaneously, where one user will see different ads at a different time, for the same ad campaign. This will help not to fatigue their eyes by seeing one ad over and over.
Next up we have is single video.

Pretty much the same as single image format. Just the “image” will get replaced by a “video”, as the name suggests.
Another cool format we can avail is the slideshow format.
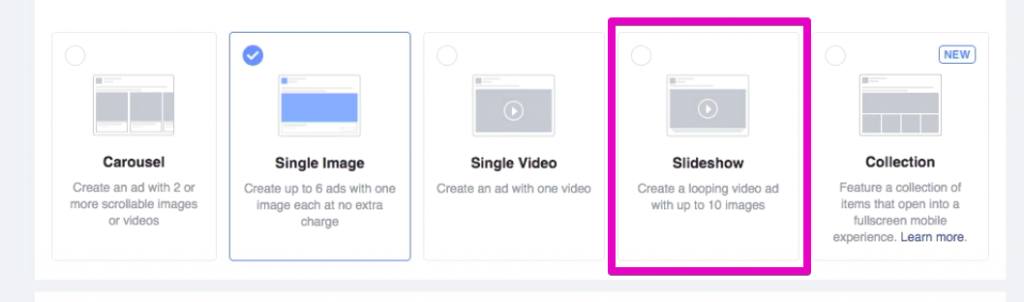
With slideshow, you can create a looping video ad where you can include up to 10 images, which will show up in cycle. Means, if you have multiple images, you can just upload them and Facebook themselves will create a little video for you with those.
This is cool because it takes no time of you to put the images together and make a video by yourself. This format is recommended when you have multiple images of a product taken from different angle or images of similar product.
In such cases, slideshow is a really cool format to choose for more conversion.
Moving on, we have collection, which is a newer addition to Facebook ad formats, as you can see in the picture.
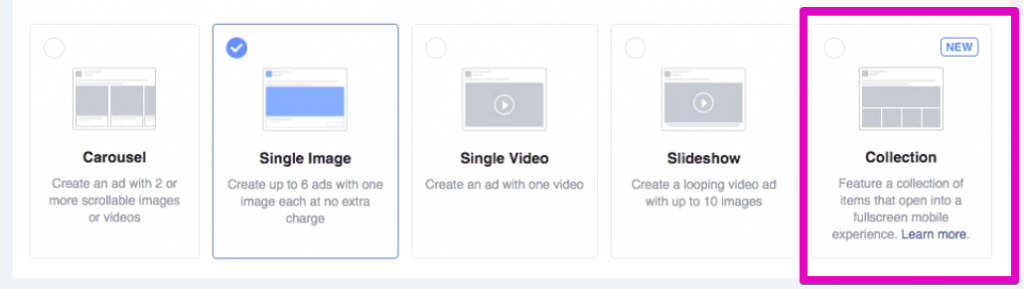
As you can understand from the name, you can create a collection of your products and show up. You may include images of your products in the below, while use the large top image slot for a dashing cover photo or so.
This can be a great selection when an online store wants to show up their recent collection.
For our ad, we’re going to stick with single image, so let’s move forward.
Underneath that, there’s the full-screen experience option.

This is pretty much of an advanced option that allows an interactive experience on mobile. It’s unchecked by default and I recommend keeping it so, for new advertisers.
Coming up next, I’ve to provide images for my ads.
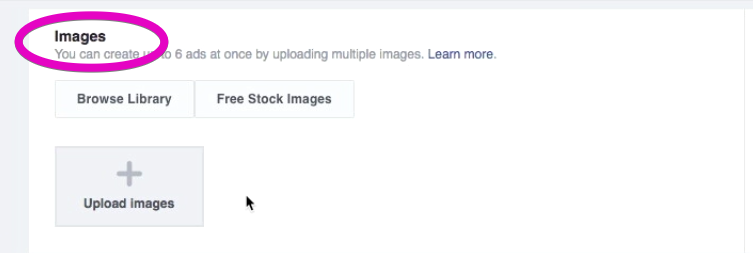
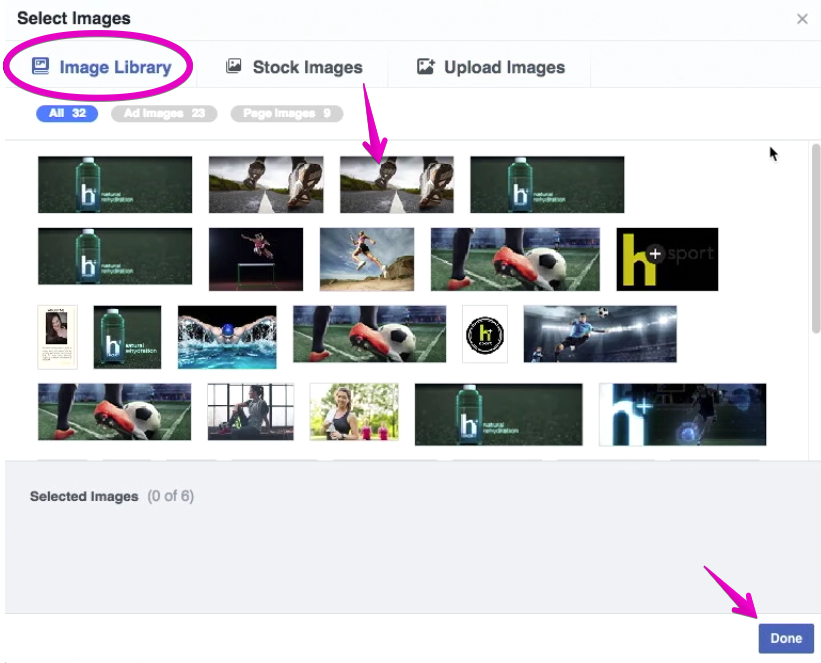
Now, I got 3 options here to provide the images. I can upload fresh image, or select from my library, or I can choose a free stock photo to use for my ad.
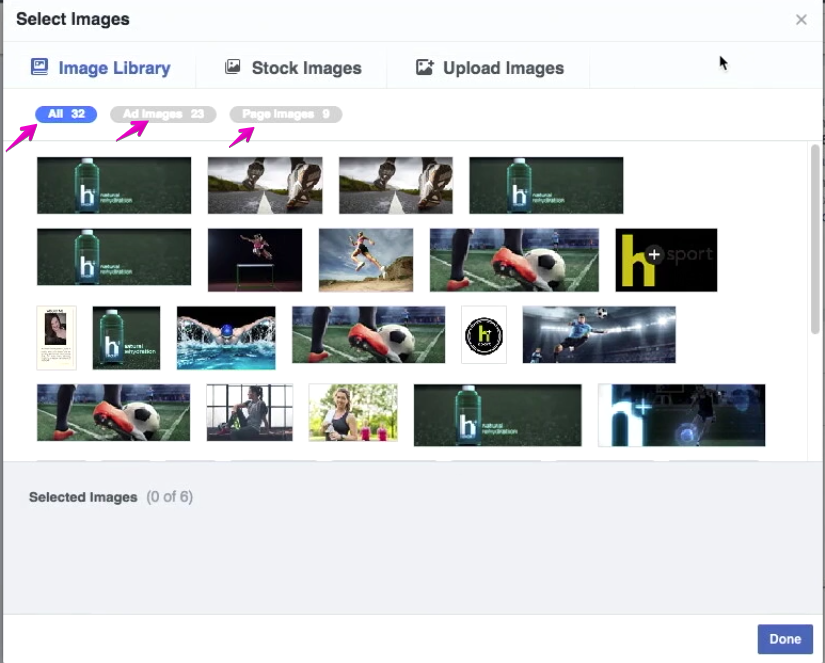
Choosing the first option, to browse image from the library, will take me to the window where I can choose images from the previously uploaded ones. If I had run any other campaigns before, the images used there will be stored here and I can select from any of those.
This window appears when I select the “browse library” option, where I can see the previously used 32 images of mine stored.
In this window, you can once again see the image providing options at the top, where I’m selecting the “stock images” option from, and this window appears.
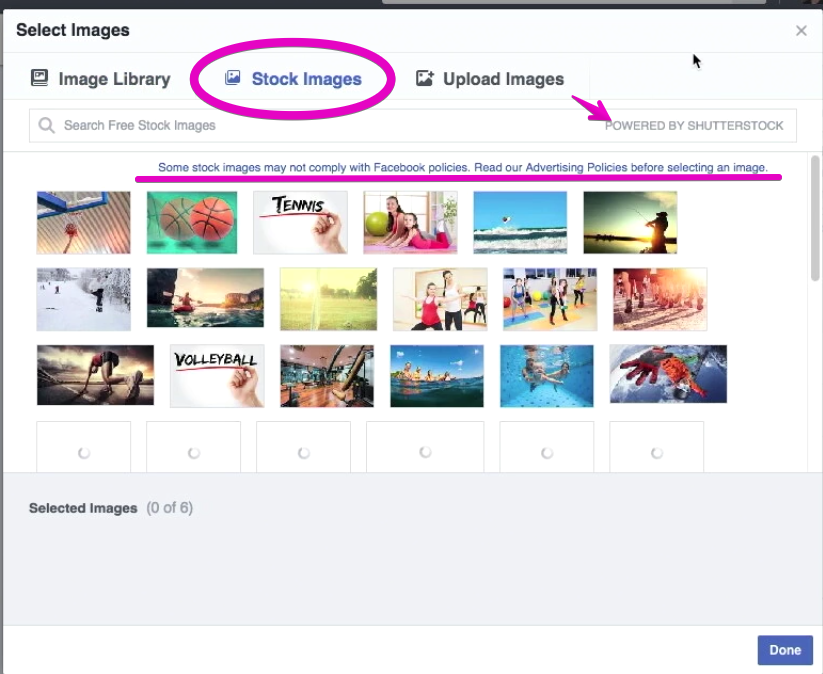
Stock photos means high-quality original images that you usually have to purchase the license of to use.
But here, Shutterstock, which is a very popular platform to trade stock images, have partnered with Facebook so you can get stock images for your campaign for free.
This is a great opportunity for you if you don’t have professional looking images ready. You can simply go ahead and type in your niche in the “search free stock images” box to get related pictures to your topic/niche.
Then again, some stock photos could be cheesy and filled with text and so, which might not comply with Facebook image policy, as underlined in the picture above. So it’ll be a good choice to read the policies before selecting a free stock photo.
The next option is to “upload images”.
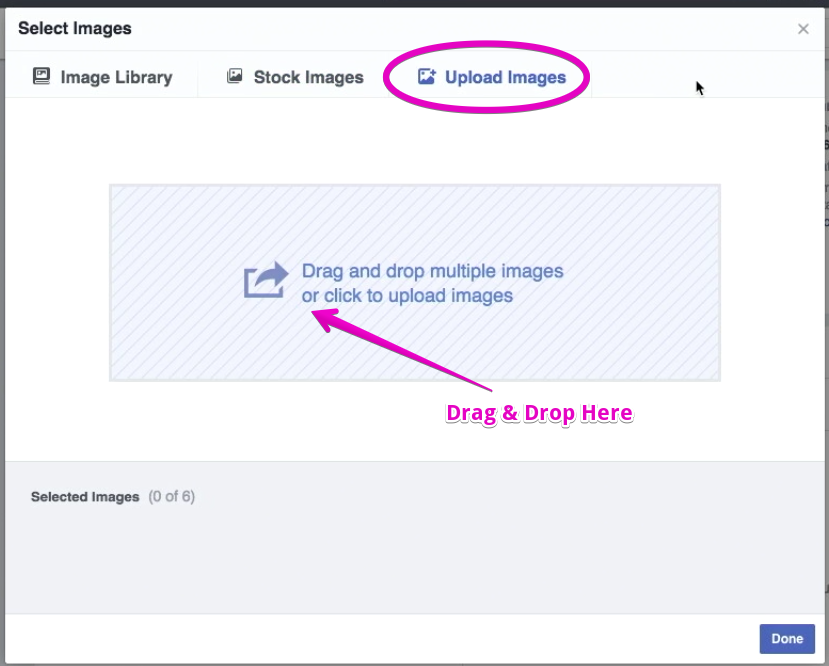
So you can just locate the image file in your computer and “drag and drop” it to the marked area to upload it.
I have already the image uploaded I want to use for this campaign, I’ll just head back to the browse library option, select the one and select okay to use it.
Selecting the image, it’ll show a preview of my Facebook ad.
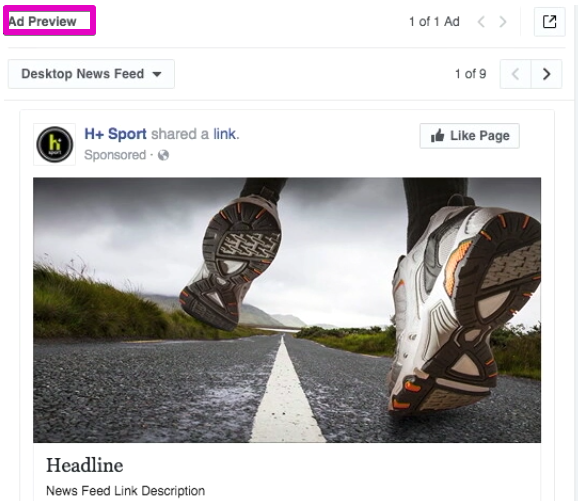
This is how the image is showing up in the advertisement preview.
Now, image sizing and resolution is a concern here. As soon as you select or upload an image, you can see it’s resolution in the lower left-hand corner of the image.
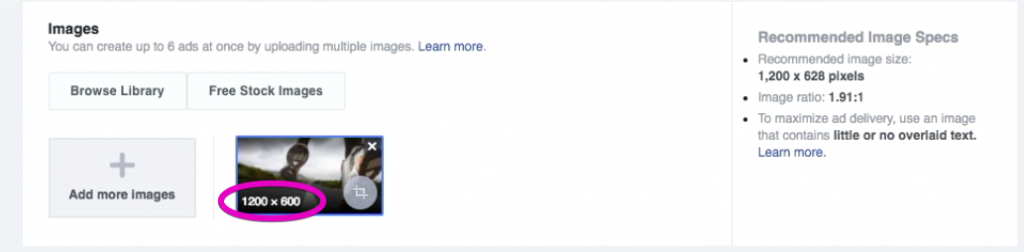
For our selected images, it’s showing the resolution as 1200*600.
Now, in the right-hand corner, you can see the recommendation for image resolution, ratio and so on by Facebook.
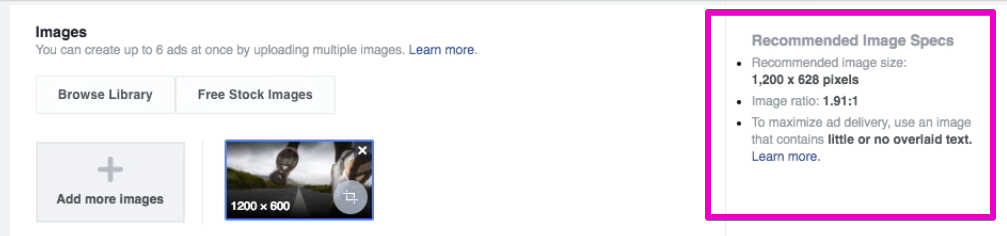
I always recommend to use the largest image possible as per facebook recommendation.
Means if the recommendation is 1200*626, then select a image with that or higher size, but not below than that, like 1000*768 etc, so you can get the largest advertising unit that ideally covers the full slot for it of the display.
It’s better to have image better than the recommendation, which will make the image look clearer and sharper in the latest devices that feature retina displays.
Now this image that we selected is going to be its own advertisement. You have the freedom to have up to six images under one campaign, which means this particular advertisement campaign will have six different looking ads associated with it.
All the six different looking ads will run simultaneously and you have the freedom to edit them later always.
But for the new advertisement, 6 different ads running simultaneously could make things complex to measure performance.
So I’d recommend to start with two images, so you can easily compare your creative (image, text) and concept’s) performance side by side, and fix things that don’t work well.
Okay, if we’re done uploading our image, now it time to look at the preview of our ad.
Going back to the ad preview section, we can see how our ad will look in the desktop news feed.
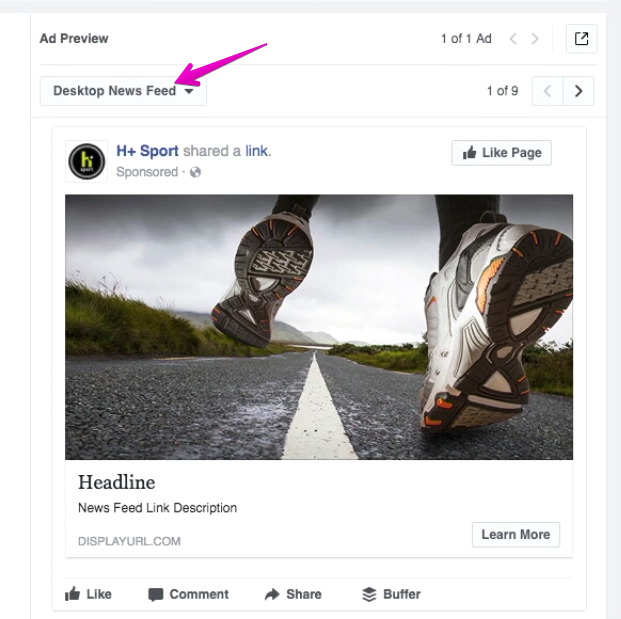
We can click the arrows on the right-hand side or we can select one option from the drop-down menu to see how our ad will look in other platforms.
So, here we’ve go ahead and selected “Mobile News Feed”. This is how the ad preview looks like.
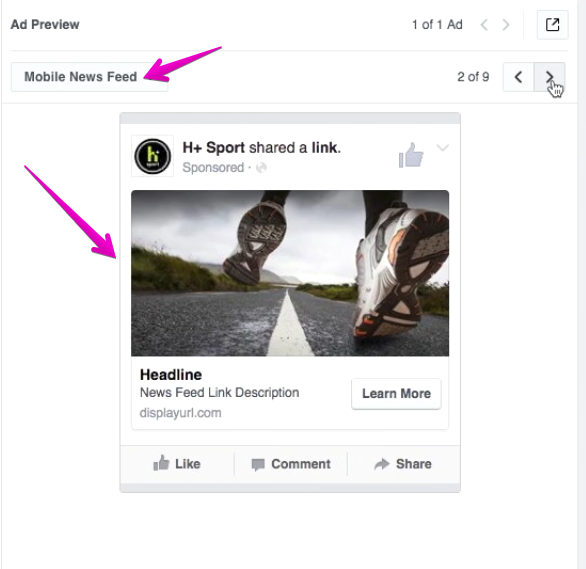
Let us choose any other option to see how it looks.
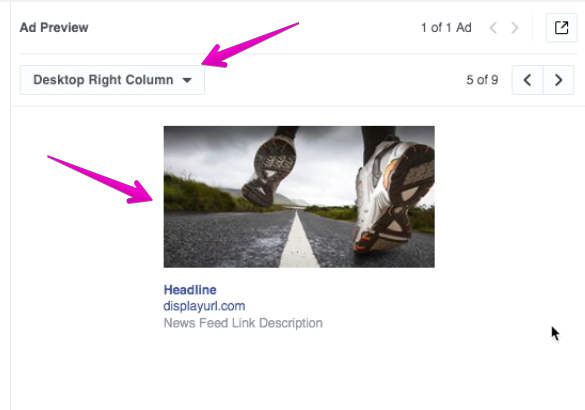
So this is how the ad will look in the desktop right column.
Similarly, you can browse the all 9 different option to figure out how your ad will look in all those platforms.
That’s All for This Lesson
After this lesson, I hope now you have a very clear idea about budget of Facebook ads and choosing creatives for your ad.
In the next lesson, I’m going to discuss how to write your ad content in a subtle appealing tone that gets the best conversion. I’ll also be discussing on Ad placing and management.
See you there.
